What are the types and applications of wire harnesses?
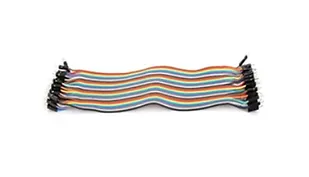
An electronic wiring harness comprises wires, terminals, plastic parts, and other components. In our electronic industry, “electronic wiring harness” generally refers to a low-voltage electronic wire group that plays a role in transmitting between two isolated electronic circuits. It is an indispensable product in electronic equipment to realize various functions.
Complex electronic wiring harnesses, such as tapes, cable ties, sleeves, sheaths, labels, etc., need to be used. For example, automotive electronic wiring harnesses are more complicated. They are different from standard electronic wiring harnesses. They generally are Multi-core soft wires, some soft cables are as thin as a hair, and several or even dozens of delicate copper wires wrap in insulating tubes, which are smooth and not easy to break.
Electronic wiring harnesses are generally for the internal assembly of electronic appliances, which are more efficient and flexible than traditional wiring.
The wiring harness processing and production process
has the following parts:
Cutting wire – peeling – brushing wire – twisting wire -tinning – terminal crimping – sub-assembly – assembly – electrical inspection – appearance inspection- packaging.
1. Cut the line
Use automatic wire cutting equipment to cut the wires according to the size required by the process, arrange the cut wires neatly (50 pieces/tie) and place them in the designated position, and paste the logo.
2. Peel off the skin
Install the corresponding blade according to the wire specification. Adjust the strokes of peeling, thread clamping, and thread trimming according to the process index. Adjust the size adjustment plate according to the peeling length. Place the wire in the middle of the blade, press the end of the wire against the size adjustment plate, and step on the foot pedal to peel.
3. Brush the line
When the power turns on, the electric copper brush turns clockwise. According to the SOP method, the exposed oblique cladding at both ends separates from the core wire, and the separated oblique cladding (i.e., the ground wire) is twisted and straightened.
4. Twist the wire
The twisting clip is complete, and the rotating force is even. Clip all the brushed copper wires into the twisting clip for twisting (the copper wire should clamp at the bottom of the middle).
5. Dipping tin
Adjust the tin furnace according to the temperature given on the SOP (300±20℃). Arrange the wires, separate and align the core conductors, dip the core conductors with flux, and send the core wires vertically to the tin furnace (size according to SOP requirements) when tinning and immediately when the core wires are in place, then take out the wire.
6. Terminal crimping
The cut wire crimps to the terminal with a small crimping machine; sometimes, multiple cables can crimp on one terminal.
7. Packing
The crimped wires are sub-packaged according to the sub-assembly process requirements. That is, the terminals insert into the sheath.
8. Assembly
Assemble the sub-assembled sub-assemblies according to the circuit directly on the drawing board (tape or draw straps bundle into bundles, that is, wire harnesses).
Use a standard wire testing machine to test the wire’s voltage resistance, impedance, short circuit, and other properties. Here you can consider working with the ATX-3000S harness tester.
10. Appearance inspection
Use the naked eye to check whether some appearance parts meet the standards, whether there are missing accessories, etc.
11. Packaging
Arrange the wires neatly and pack according to the method shown in the figure (500PCS/box) 50PCS/bar, 5 bars/bag, and two bags/carton; when the package is complete, use a carton sealer to seal and label the box.